Archive for ‘Urban Garden’

September 17, 2013

Urban Farm September Update

I checked my blog today to see when I last posted about my Urban Farm project.

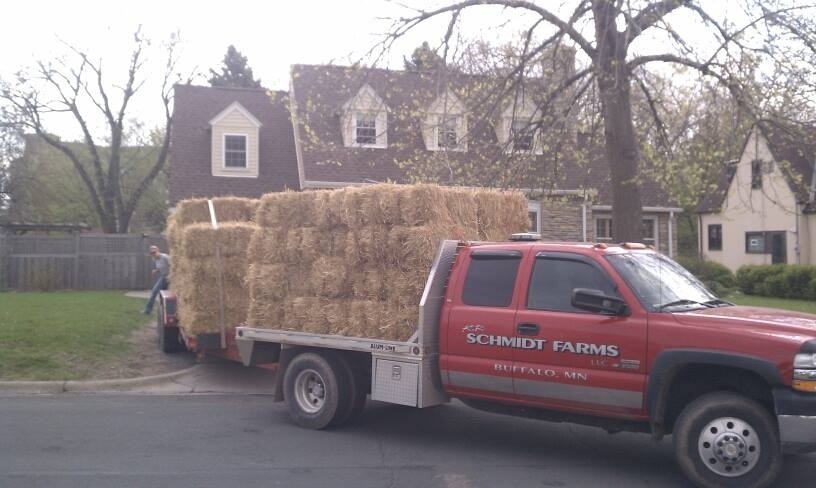
June?  No!  I must have posted something since then, I thought to myself.  I surfed a little and realized that sure enough, the last you heard I planted 40 straw bales in my front yard.

Well, shame on me!  I do give myself a little slack because I have at least been posting periodical photos on Facebook.  If you want to catch up a little of what’s happened between June and now, be sure to checkout the Walnuts n Pears Facebook page.  While you’re there make sure and “Like” my page (if you haven’t already) and you can keep up with events, postings and photos of all that’s going on.

So… Let’s doing a little catching up, shall we?

Last you saw, my yard looked like this:

20130617-235426.jpg

With this innovative raised bed from Organic Bob.

20130618-000157.jpg

Well, seeds got started, transplants got planted, it rained for forty days and forty nights and then we went into a six week drought.  I fought aphids on eggplant, squash vine borer on zucchini and some evil critter on the watermelon.  Despite the challenges the garden or farm, rather, started to look like this:

IMG_4153

IMG_4154

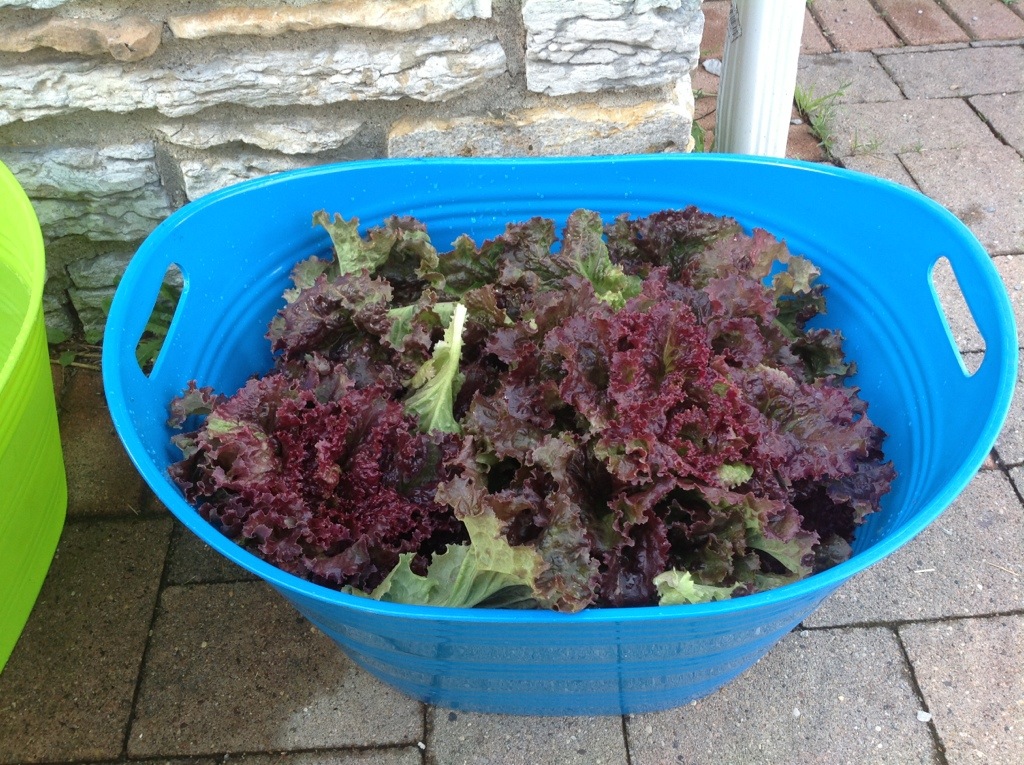
And I harvested and harvested… and now it looks like this:

IMG_5816


But it’s kind of hard to see what’s going on from this angle, so let’s go on a virtual tour, shall we?

The June-bearing strawberries are done, but spreading quite nicely.  The late Nicotiana (Flowering Tobacco) is just getting ready to bloom and some Romaine lettuce is making a return.

IMG_5818


Brussel sprouts have taken a spill because the bales have decomposed enough that they can no longer support their weight, but they aren’t damaged, so they should keep growing (I may try staking tomorrow).  They still have some maturing to do, but I can hardly wait for a few hard frosts to bring them to the table.  Redbor Kale is continuing to produce but the Romanesco Broccoli has yet to form a head (bummer)!

IMG_5819


Up next we have the second set of Brassica family plants with more Brussel Sprouts on the left, Arugula in the middle and Cabbage tipping off to the right side.  In the lower right corner you can spot one of our two Pumpkins.

IMG_5820


Russian Kale in the foreground, not to be forgotten!  My favorite kale is still producing nicely.

IMG_5842


Cabbage up close and personal.

IMG_5841


I decided to make the raised bed the Children’s Garden this year.  My son and his friend planted, cared for and harvested from this bed this summer.  I helped seed the sides, but with the drought and intermittent watering they lost a number of the seedlings.  No hard feelings on their part though, they had plenty to harvest from their garden this summer including tons of Sun Sugar Cherry Tomatoes, Aunt Molly’s Ground Cherries, some beautiful Zucchini, Sugar Snap Peas (which you can see in the dried format on the right side for saving seed for next year), peppers, radishes and their Ring of Fire Sunflowers were gorgeous!  Okay, you can’t tell here because now they are just seed heads…

IMG_5822


… but THIS is what they looked like the majority of the summer.

IMG_4611


On to the squash and melons… This bed is where most of my frustrations came from this summer.  It started with squash vine borers attacking the Zucchini.  I did some “surgery” slicing into the vine and mutilating the buggers with a knife which allowed the plant to continue producing, but it was never quite the same.  Next, some dirty little rats, squirrels or rabbits severed all of the watermelon plants leaving me with next to nothing.  Lucky for them I never caught them in the act!  Finally, we have more squash vine borers attacking, hence the sickly, wilty leaves, but since it’s so late in the season I’m choosing not to battle them because I’ve already harvested quite a bit of squash.  Oh, and Cantaloupe!  Well, so far the score is 1-1 Rodentia vs. Us but the one we had was wonderful!

IMG_5823


The other Pumpkin.

IMG_5839


Up next: Swiss Chard, Globe Artichoke and Celeriac… along with some migratory squash.

IMG_5824

Sadly, one-by-one over the past few days, my Globe Artichoke were decapitated and left for dead.  This was pretty disappointing because Globe Artichoke is a perennial here in Minnesota and it’s the first year I’ve grown it so I was pretty excited to have it be a part of my garden.  I still have a lingering hope that the root, still in place to my knowledge, may still produce some leaves and try to survive.  It’s a stretch, but you never know.

IMG_5833


This set of bales was interesting.  They get far more shade than the rest, they were last to heat up during the “conditioning” process, but also spiked up to 140 degrees.  I had to wait longer to plant them because they retained the heat as well.  The Lettuce is long gone (except for the couple I’m allowing to go to seed), Carrots are still doing well and the pickling cucumbers are still going strong.  If I counted correctly I should have quite a few ready in the next few days.  I’m trying to decide what to do with this set next year.  There isn’t enough sun for the majority of crops so it may have to begin a crop rotation of its own of part-sun crops.

IMG_5825


And finally, Tomato Alley!

Home to about 13 different varieties of tomatoes, half a dozen or so peppers, a few varieties of eggplant and bunches and bunches of basil.

IMG_5830

IMG_5852

I almost forgot!  Another Cantaloupe, hanging out under the crib-rail trellis on the backside of the squash bales.  Not too much longer and I’ll be racing the critters for the harvest.

IMG_5835


Well, that completes the tour for today.  I think it has progressed nicely, don’t you?

Oh, and in other news, I had my final walk-through evaluation two weeks ago and assuming things continue to go well I should be a certified Urban Farmer in a couple of weeks!

Kate

July 22, 2013

55 Days – 10 Things to Plant Now for Fall Harvest

image

I don’t want to be the one to break the news, but we have about 55 days left until our average first frost hits the Twin Cities.  Now before you get mad at me for mentioning frost, keep in mind that I’m actually trying to give you good news.  That means it’s time to do some succession planting!

“What’s that?” you say.  That is where you take places in your garden where you once had lettuce or radishes or peas… and now have holes and fill those holes with plants that will mature and be harvest-able in the 55 or so days.  You’re looking for plants that prefer warmer soil temperatures for germination, but will also do well when they mature when the days are shorter and nights are cooler.  Think fast growing warm season crops or longer growing cool season crops.  You want the warm season crops to be wrapping up (beans, beets, etc.) and cool season crops to be beginning to peak, because cool season crops actually grow and taste better with a little cold snap (it brings the natural sugars out).

Below, I’ve listed plants that could be planted now for fall harvest and some that should wait a couple of weeks.  You’ll notice I have some duplicates under different time frames.  Why do I have radishes at 20 Days and at 50 days?  Well, it depends on the radish.  Check your seed packets for the “Days to Maturity” section, this number will tell you how many days it should take (on average) for your plant to go from seed to harvest.  Also check for “Planting Tips”, “Green Thumb Tips”, etc.  A lot of times they will provide the information you need on when to plant right on the seed packet.  Take the French Breakfast Radish, for example, (which has 26 days to maturity) the packet notes that it germinates best when the soil temperature is 80 degrees, which is where our soil temperature in the Twin Cities is right now.  Other packets will say “Best grown in cool weather.” Or “Warm days, cool nights.” All of these are flags telling us the best time to plant for optimal harvest.  The trick is really to read the packet, determine what conditions they grow best in and then check the days to maturity to see if we have enough time to grow it.

Examples in order of days to maturity, meaning if you can’t get them all in the ground today, start planting those with the most days to maturity first, followed by those with the least days to maturity.  You can also do a series of plantings with faster growing crops like radishes and arugula, then you’ll be able to harvest some about 3 weeks from now and some about 6 weeks from now, or plant a little each week for harvest 3, 4, 5 and 6 weeks out.

If you were to plant all of these today, you would have something to harvest every week starting 3 weeks from now, through fall.

20 Days: Beet Greens, Radishes

35 Days: Arugula

45 Days: Lettuce, Beets, Spinach, Broccoli Raab, Peas

50 Days: Beets, Beans, Red Malabar Spinach, Carrots, Radishes, Broccoli, Pickling Cucumbers

55 Days: Golden Beets, Broccoli Raab, Beans

55+ Days: Carrots

One more thing to keep in mind is that the average first frost is not necessarily the end of the gardening season (many crops will do well in cool weather) it’s just another tool to use to help us grow as much as we can in our gardens.

So, while the days are still warm and we still have nearly 2 months of summer weather, grab your seeds, get out there and fill those holes!

Happy succession planting!

Kate

July 9, 2013

Rise With The Son

My son is an early riser. He has been since the day he was born, nearly nine years ago. And every day since then I have cringed that he’s an early riser. That is, until today.

You see, today we started harvesting from our little farm in the city, the little urban farm, the front yard garden, the straw bale garden. But today we did it a little too late. We got out there late in the morning, after the rain stopped, and harvested salad greens and kohlrabi. Then we started “processing” our greens; harvest, cool, triple wash, dry, weigh, bag and cool. Along the way we did a little sampling. We were disappointed to find some of our greens were bitter. This can happen for a few reasons: the greens got too big, they are not heat tolerant varieties (ours are) or they were harvested too late in the day. So we sorted through our greens, figured out which ones were still sweet and which went bitter. Although we got a nice harvest, we composted an unfortunate amount of bitter greens and decided that tomorrow we’re starting earlier, before the sap in the lettuce goes bitter from the heat.

20130709-224445.jpg

I can’t tell you how many days since starting this adventure in January, that I’ve gained so much respect for the farmers who grow and supply us with food every day. They rise with the sun, go to bed with the sun and work every hour in between. We’re trying to plan a little road trip this summer and it’s stressing me out. I can’t stop thinking that I might be gone when my harvest will be at it’s peak. And if spring had been “normal” I would be closer to my original harvest schedule, but it wasn’t normal and having put all of this time and energy into the garden this year, I want to minimize as much loss as possible. And… assuming I’ll be able to sell some of the produce, it would be a shame to miss that opportunity as well. This experience has made me realize just how connected to the land farmers really are. They are caring for our food from the day the seed hits the soil until the day the crop comes out of the ground. They know when it is too early to harvest, too late and when it is just right. It has also reminded me why school starts when it does in the fall and ends when it does in the spring. It has made me realize that when you are growing a garden for your family it doesn’t matter so much when your crops hit peak harvest, but if you are growing for others, or for your livelihood, it does. This experience has made me wonder if I will still want to do this again next year when I get to the end of this season (I’m pretty sure I will). And it’s made me realize that food really isn’t all that expensive when you realize the time in planning, planting, tending, watering, harvesting and proper handling that goes into it. Are those fresh greens or those tomatoes worth the money they are asking for them? Um, yes. And probably more!

20130709-224630.jpg

It’s funny, when you begin to walk a day in someone else’s shoes, you begin to gain perspective into their life and have a different appreciation for who they are and what they do. Somehow, we become a little more connected, even if it’s just a better understanding of each other.

20130709-224815.jpg

Before I go to bed tonight I will say a little prayer, thanking all of the farmers for the food they have grown that has nourished me for so many years when I was too busy worrying about other things to stop and genuinely thank them for what they do.

And then, tomorrow, I will rise with my son and we will begin to harvest again.

Kate

June 18, 2013

Urban Farm Update

Back in April I introduced you to my bare front yard and the beginning of my urban farm.

Quite a bit of time has passed since then and there’s been a lot going on, so let’s see how far we’ve come, shall we?

As I was waiting for spring to come and mulling over the possibilities of the design and method of starting my farm, I attended Joel Karsten’s seminar on Straw Bale Gardens and bought his book.  That led to a few phone calls, which lead to this.

20130617-235045.jpg

Eighty five straw bales getting delivered to my home.  No, I didn’t plant all 85.  I ordered extra for some of my friends and family that are “doing the bales” as well.  I’m only using 40.

But before ordering the straw bales, I had to make a final decision on which design I was going to go with.  After toying with a few ideas I decided that I really liked one of the keyhole garden designs from the book Gaia’s Garden by Toby Hemenway, which looks like this.

20130617-235251.jpg

I modified it a little to work with straw bales, add a couple of openings for access both for logistical and community purposes and ended up with this.

20130617-235426.jpg

It’s a little geometric with the bales, but part of my long-term plan is to turn at least some of the straw bales into traditional keyhole beds. At that point the overall design will begin to look more like the design from Gaia’s Garden, which is a modified mandala garden.  Another thing I’m trying to achieve with this garden is to make it partially a perennial, edible food forest garden and partially an annual food garden.  In addition to planting the straw bales, I am adding fruiting shrubs as well as annual and perennial food and flowers for both pollination and for attracting beneficial insects in the areas between four of the horseshoe-shaped beds.

You would think that would be enough to keep me busy this summer, but having a little bug for trying new things, I also decided to add a four-foot raised bed from Organic Bob.  You see, part of my plan for this space is to make it a learning space and I wanted to include a learning space specifically for children.  Turns out this raised bed was the perfect solution for that.  And not to go on about the bed itself, but one of the things that makes this bed unique is that you can plant in the sides as well as the top, and orientated the right way, you can take advantage of the sun and shade, planting heat-loving plants on the South side and those preferring it a little cooler on the North side.  Nothing like playing with your food before it even hits your plate!

20130618-000157.jpg

In the above picture, you will find two clay circles sticking out of the soil. Those are Ollas. Ollas are unglazed clay vessels that you “plant” into the soil when you are planting the rest of your garden.  The vessel gets filled with water which gradually seeps out into the surrounding soil both benefiting the plants by encouraging deep roots, making them less susceptible to drought and minimizing surface watering, thus cutting down on nutrient loss as well.  From what I understand, the only drawback in our climate is that they need to be dug up in the fall because if they are left in the ground over the winter they will crack.  I’m pretty excited about them because they can be used in every climate, probably even more effective or beneficial in hotter climates, which is where, if I’m not mistaken, they were originally developed.

66807530_scaled_144x192

This is what my Ollas look like, but they come in a variety of shapes and sizes.  I got mine here, but they can be found in other areas and there are DIY methods of making them from clay pots as well.

Well, I think that covers the highlights of what’s going on with my little farm in the city.

Until next time, enjoy the sunshine and envision an abundant season!

Kate