Archive for ‘Seed Starting’

April 24, 2013

Timing: Seed Starting, Planting and Beyond

a-to-z-letters-t
Timing.  It can mean making it big or missing it all.  It can mean coming in with the choir or sticking out like a sore thumb.

Timing, in so many areas of our lives can “make it or break it”.  Timing in the garden isn’t quite as cut and dry as other situations in life, mostly because we’re dealing with Mother Nature and that means what we do and when we do it depends upon the weather, which can make timing a bit of a guessing game.  Even though historically speaking weather has been a certain way in April or May, Mother Nature is going to do what she wants to do. (Take our never-ending winter for example.)  So when you garden, you need to be willing to be flexible regarding timing.

Timing: Seed Starting

That said, there are some basic timing guidelines that will help us at least aim in the general vicinity of when things “should” happen in order to have a fruitful season.  Take seed starting for example: When you look at a packet of seeds, it is loaded with information.

IMAG4148  IMAG4149

Let’s use my packet of Wapsipinicon Peach Tomatoes. For the sake of this post, we’ll only focus on the information pertaining to timing.

Start Indoors: 6 weeks before last frost

Germination: 7-14 days

Green Thumb Tip: … Tomatoes are sensitive to freezing temperatures, so wait to transplant outdoors until the soil is warm. …

Okay, so what does that mean?  To begin with, “Start Indoors: 6 weeks before last frost” means you need to determine when the last frost is going to happen in your area.  When I first started gardening my thought was, “How the heck do I know when the last frost is going to be?!?”  Turns out, we aren’t expected to look into a fortune teller’s crystal ball.  No, instead, we are to look at the history of the weather in our area over the past 10 years to determine when the average last frost occurred.  Luckily for us, there are people out there who track this information so we don’t have to figure it out!  If we search on the web for “average last frost date” along with the city we live in, we should see either a map of our state which shows the average last frost dates across the state or a list of major cities in our state and the average last frost date for each city.  In Minneapolis, our average last frost date is May 21st (recently adjusted from May 15th).

Okay, so now we know that we (in Minneapolis) should plant our tomato seeds indoors 6 weeks prior to May 21st.   If we count 6 weeks backwards from May 21st that puts us at April 9th. Oh, April 9th has already passed.  Hopefully we already planted our seeds around that time frame. But let’s say we didn’t. Now what?  Well, now, we look to the next piece of information, “Germination: 7 – 14 days”.  This piece of information is actually more beneficial to knowing whether our seed was viable or not.  (If we haven’t seen any signs of life by 14 days, we are probably not going to.)  However, it’s also good to know that we need 1 – 2 weeks just for the seed to start growing.  Hmmm… we’re about 2 weeks behind schedule and it’s going to take 1 – 2 weeks just for it to germinate?  That puts us at May 1st – May 8th before there are any signs of life.  That’s going to be a pretty young plant to put in the ground by May 21st.

But here’s the good news, “Tomatoes are sensitive to freezing temperatures, so wait to transplant outdoors until the soil is warm.”  That sounds pretty vague, doesn’t it?  It is, but a little research will show you that tomatoes typically need soil temperatures higher than 60 F for the seed to germinate and they won’t grow unless the air temperature is at least 55 F.  In fact, it is recommended not to put them outside until the nighttime lows are at 55 F or higher.  In Minneapolis, that nighttime average temperature doesn’t come until the end of May or beginning of June.

Ha, ha!  Did you catch that?! We just bought ourselves a little time!  The end of May or beginning of June is another week and a half (past May 21st), which just so happens to be roughly the same amount of time that we are “behind” schedule if we didn’t already plant our tomato seeds.  So can we still plant our tomato seeds today?  Yes! (But we need to hurry up and do it!)

When thinking about how to time planting seeds, the other thing to consider is when you plan on planting your garden.  Personally, I don’t like to plant my warm season crops (those that prefer warm weather and really dislike or won’t grow under colder conditions) until around Memorial weekend.  At that point we can (typically) safely assume there won’t be any further chances of frost, the daytime and nighttime temperatures are rising and the soil is starting to warm up.

In summary, to figure out timing as to when to plant your seeds, you need to know:

  • The average last frost date in your area
  • When to start seeds indoors (number of weeks in advance)
  • When you plan on planting your garden

With those pieces of information, you can simply count backwards (in weeks) from your average last frost date and mark on your calendar or organize your seeds by weeks so you know what to plant when.

It’s also important to note that some seeds are to be “direct sown“, in other words, they do not need to be and typically shouldn’t be started indoors, but instead planted directly into the garden (such as peas, carrots and radishes).  This too, should be noted on the seed packet.

How To Get From A Pile of Seeds To A Planting Schedule

IMAG3958

I lay out all of my seeds by type (tomatoes, cucumbers/squash, peas, beans) because typically, plants in the same family are going to require the same timing (give or take a week).

IMAG3999

Then, using my calendar, I figure out when each seed packet needs to be planted and group them together by week.  I put them all in a box with the seed packets behind their proper week.  This makes it quick and easy to look and see what needs to get planted each week and I can simply grab the packets, plant the seeds and move onto the next group the following week.

Timing: Planting in The Garden

As far as timing the planting of your garden, it’s important to remember that different plants prefer different conditions, so you should plan to plant your garden in phases.

Tomatoes, peppers, eggplant and beans are all warm season crops, so I wait to put them into the ground until things warm up.  Cool season crops, on the other hand, (cole crops such as broccoli, cabbage, kohlrabi, etc.) prefer colder temperatures, as do peas and spinach, so as soon as the snow melts and the soil starts to dry out, it’s time to get those plants in the ground.

Don’t try to get your whole garden planted in one day. Give yourself a week to plant, whether it’s planting seeds indoors or planting in the ground.  Shoot for “the week of…” rather than a specific day.  That way if the weather or life gets in the way of the exact day you targeted, you’ll have a little wiggle room.

If you live in Minnesota you may be wondering whether we are still on track for spring planting given the late winter weather and seemingly endless amounts of snow…  The bad news, is, yes, the cool/cold season crops are a week or two behind, but the good news is that forecast is for the 50s F, 60s F and even 70s F in the coming days in Minneapolis and with a few days of sun and dry weather the soil will begin drying out and warming up pretty quickly.

That said, I realize many of us are anxious to get out into our gardens, but again, we need to be flexible and need to keep the plant’s and soil’s best interests in mind.  In other words we need to make sure the soil is “ready to be worked” prior to diving into the garden or we can do both our soil and our plants harm which can set us back years instead of just a couple of weeks.  So how do you know if your soil is “ready to be worked”?  Test for moisture content and temperature.

To test soil moisture content, simply grab a handful of soil and squeeze it.  If it stays together in a clump it is still too wet to be worked.  We want the soil to break apart in our hand when it is squeezed.  Working soil when it’s too wet will cause compaction, which is detrimental to the soil and can take years to repair, we can prevent soil compaction by waiting to work the soil until it had properly dried out. Planting seeds when the soil is too wet can also cause the seeds and/or seedlings to rot and invites disease problems into the garden if the plant were to survive.

To test soil temperature, simply use a soil thermometer.  Soil thermometers will help you observe whether your garden is ready for your plants.  They are relatively inexpensive to buy and are available at most garden centers or nurseries and some hardware stores even carry them.

Keep in mind, when it comes to moving seedlings outdoors, if the air and soil aren’t warm enough, it is actually better for the plants to keep them inside under lights and in consistent temperatures than it is to put them into unfavorable conditions.  In the long run, your plants will be stronger and do better if you keep them inside just a little bit longer.

Beyond Timing:

I highly recommend having a calendar just for gardening.  You can mark the average last frost date, average first frost date (in the fall), when to start seeds and even when to harvest (by using the harvest information on the seed packet).  You can also include when to do succession plantings and jot notes as to what you planted when (vs. your target planting dates).  This is a great reference tool later and an excellent companion to a gardening journal!

Remember, gardening is supposed to be enjoyable.  The timing is important, but not critical.  Observe and be flexible!

Kate

April 22, 2013

Seed Starting 101 (An Earth Day Project)

a-to-z-letters-s

Happy Earth Day!

What better way to celebrate Earth Day (and for those of us in Minnesota to forget that it’s snowing again) than starting seeds to plant a garden?

So here we go…

Seed Starting 101

IMAG3989

1.  Wash your hands.  This feels like an oxymoron. Wash your hands before getting them dirty?  In this case, yes.  When handling seeds and the soil they grow in, we are trying to start a life.  We want to make sure that we have a sterile environment in order to minimize as much bacteria, virus and contamination as possible.

Note: Hand washing is extremely important for smokers because Tomato-Tobacco Mosaic Virus Disease can be spread by the fingers of smokers touching plants, particularly those found in the Nightshade family (tomatoes, peppers, etc.).   More info on Tomato-Tobacco Mosaic Virus Disease can be found here.

2. Start with a new or sterilized seed tray, pot or other container with drainage holes.  Again, we’re looking for a clean sterile environment to start our seedlings in.  All containers must have drainage holes to allow water for proper drainage and to prevent drowning our precious seedlings.

Note: To sterilize containers, soak in a solution of 1 part household bleach to 10 parts water for 30 minutes.  Rinse thoroughly.

3. Pour soil-less seed starting mix into a sterilized container.

Note: Soil-less mixes work best because they are light weight and retain moisture while also providing air space and drainage necessary for seedlings.  Soil-less mixes are also sterilized to limit disease.  Soil (garden soil, top soil and potting soil) is not recommended for starting seedlings because there is an increased risk of disease, weed seeds and typically does not have adequate drainage required for seedlings.

IMAG3982  IMAG3987

4. Moisten seed mix, gradually adding water until the soil mix is like a damp sponge but not dripping wet.

Note: If using municipal water, make sure to “air out” water prior to using on plants.  To “air out” water pour tap water into a sterilized milk jugs or similar container.  Leaving the cover off, allow it to sit for for 24 hours to allow chlorine to evaporate.  Chlorine will cause leaf-drop and can kill plants.

IMAG3991

5.  Gently fill seed trays or containers with damp soil mix, and level off.  Do NOT pack the soil into the container.  Seedlings need air space for their delicate roots to get established.

IMAG3995 IMAG3997

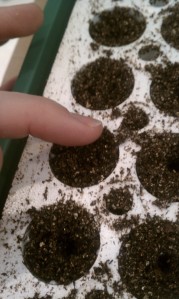
6. Using a sterilized dibble or dull pencil, make a small impression on the surface of the soil in the middle each cell or container, about 1/4- inch deep.

IMAG4008 IMAG4009

7. Place 2 – 3 seeds in the hole (unless otherwise noted on the seed packet).

IMAG4003 IMAG4004

8. Label as you go.  Include the date you are planting and the variety planted.

IMAG4010

9. If seed packet says to plant 1/4 inch deep, lightly cover seeds by sprinkling a thin layer of seed starting mix or vermiculite onto the surface of the soil.

IMAG4012

10. Place seed tray or containers into a solid tray (without drainage holes).  Water seeds by gently misting the surface with a spray bottle filled with “aired out” water or by bottom watering.  If bottom watering, make sure to drain off extra water after soil is thoroughly moist to prevent “damping off” (a fungi which will kill seedlings).

IMAG4014

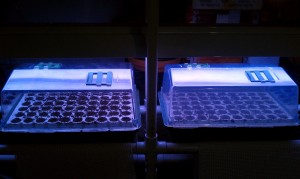
11.  If using a “green house” seed tray, cover, keeping vents closed if available, and place under plant lights (or a sunny window).

IMAG4028

12. Watch for seedlings to sprout.  If using a green house cover, adjust vents to allow for air circulation.

13. Check seedlings daily for water.  Do not allow seedlings to dry out or to sit in standing water.

Tips:

As seedlings grow, raise plant lights, always keeping as close to the plants as possible without touching them.  Don’t worry, plant lights do not generate enough heat to burn or harm the plants.  Keeping the plant lights close to the seedlings will keep the seedlings compact and prevent them from getting “leggy” (stretching for the light).

When the seedlings have developed 2 sets of leaves (the first set of leaves are the cotyledon or seed leaves, the second set of leaves are the “true leaves”) transplant to a larger container, if necessary.

Run an oscillating fan near the seedlings to mimic wind in order to grow stronger plants and help prevent damping off.  Place the fan close enough to provide a gentle breeze, but not so close as to be a gale-force wind.

Have fun!

Kate

April 2, 2013

Blackstrap Molasses Fertilizer

20130402-230852.jpg

Blackstrap Molasses. Strong, dark, sticky. Rich, pungent, earthy. When I think of molasses I usually think Gingersnap Cookies. Oh, how I love gingersnap cookies. Just the thought of them makes my mouth water. Until about a month ago I never really gave it much thought as to what molasses was made of, it was just molasses.

Blame it on the long Minnesota winters, but come late January, early February, after the holidays have passed, I get bored, antsy. I need to do something. And by “do” I mean grow something. You see, by this point the ground outside has been a frozen arctic tundra for 4 or 5 months, spring doesn’t come for another 3 or 4 and it’s too early to start seeds for the garden. So usually about this time of year I set my sights on my “house plants” of which I have about a hundred. And by house plants, I mean plants that I am currently growing in the house, not necessarily house plants as you may normally find.

I love plants. Every kind of plant. I have no prejudices against them unless they are mean to me (burn or poison me), taste bad or don’t mind their manners (invasive), otherwise I can usually find something cool about pretty much every one of them. To give you an idea, my sunroom currently contains: hops, jasmine, bay, spearmint, asparagus, sedum, a lemon tree, a dead lemon tree, a pomegranate, a dead palm, a juvenile avocado tree, 3 or 4 orchids, a really cool pink flowered thing, mother of thousands, begonia, asparagus fern, passion-flower, a couple of pathos, a half-dozen or so Christmas cacti, and a bunch more I don’t recall at the moment.

With all of these plants you would think I would cruise through fertilizer, but you see, that’s the thing I don’t particularly care for chemical fertilizer, so I usually don’t feed them, or I haven’t anyway, until last month. Then when my sights got set on my house plants, I had this nagging in the back of my mind that I need to do something to feed them. That’s when I remembered a conversation with my friend Organic Bob, a soil guru, mentioning that in his organic lawn care business they use compost tea on lawns then “feed” them with molasses. So I wondered, could I use the same stuff for houseplants? I did a little research and found that in addition using it on lawns and organic veggie gardens, sure enough, you can use molasses on houseplants as well. Although it’s best when used in conjunction with another fertilizer, such as compost tea, alfalfa tea or fish emulsion, it can be used alone too.

Molasses is the byproduct from the sugar-making process and is very high in nutrients. Just to give you an idea of how nutrient rich it really is… It contains iron, magnesium phosphorus, potassium, sodium, zinc, cooper, manganese, selenium, thiamine, riboflavin, niacin, pantothenic acid and choline. And, no, I cannot pronounce all of them and I can’t remember them off the top of my head, but the key thing to remember is that molasses is very nutrient rich.

But it gets better: there are different densities of nutrients due to how molasses is made. To get that info, we need to delve into the sugar-making process a little. The sugar-making process is a three-step process using cane juice from sugar canes or beet juice from sugar beets. Basically, they take the cane juice or beet juice and cook it down until sugar crystals form. The sugar crystals are removed, leaving behind all of the nutrients from the sugar cane or sugar beet in the byproduct syrup called molasses. This syrup is boiled a second time, again removing the sugar crystals and leaving behind the nutrients in the syrup. After the third boil what is left is very dark syrup dense with nutrients, known as Blackstrap Molasses.

Unsulphered Blackstrap Molasses is the best choice for use as a fertilizer, partly because it has the most nutrients of the various molasses and partly because it is unsulphered. Unsulphered means it was not processed with sulfur dioxide to keep the sugar cane or sugar beet “fresh” until processed into sugar. But to keep it fresh means it kills microbes and we want to keep microbes because we want to feed the soil. So what we are looking for is microbe and nutrient rich molasses or Unsulphered Blackstrap Molasses.

So I suppose you are wondering if it works. Well, I don’t believe in reading books or info on the internet and just regurgitating information without actually trying things myself to see how it works, so I did just that. At first I experimented with just a few plants. Within days of giving them an initial feeding they put on new growth, started putting out new buds and started perking up. I’ve now fed nearly all of my plants with molasses and while I realize the longer days and stronger sun are helping things along, every one of them has put on new growth, many have blossoms (my jasmine plant is in full bloom) and their overall health has improved, so I would have to say yes, it works.

I realize it’s not fair to talk about it without sharing the info, so here’s the recipe I used:

Blackstrap Molasses Fertilizer

2 teaspoons unsulphered blackstrap molasses

1 liter water

Mix well and feed plants once a month. That’s it!

If you are interested in recipes combining molasses with some other fertilizers these are good sources to check out:

Fertilizing Houseplants with Blackstrap Molasses

Molasses and Alfalfa Tea Mixture

So there you have it. I guess molasses isn’t just for gingersnap cookies anymore! I can’t wait to try it on my seedlings and in my garden this summer.

Kate

March 20, 2013

16 Things to Do Now to Make it Feel Like Spring

It’s here!  It’s here!  Spring is here!

Yes, I know, you wouldn’t know it if you were to walk out your front door in Minnesota today.  In fact, you might think it were the middle of January.  I awoke this morning to the weather update of wah-wah, wah-wah, wah, wah with an -18 degree windchill.  Yikes!

If you look at Facebook at all today you’ll see a lot of whining, particularly here in Minnesota.  Unfortunately all of the meteorologists have been touting the weather we had this week last year at 70 and 80 degrees above zero making all of the complaining even worse.  The problem is, last year was NOT THE NORM.  The norm this time of the year in Minnesota is 35 to 40 degrees, which while a high of 18 today isn’t exactly tropical, if you compare it to being 20 degrees off the norm instead of 60 degrees off a record, it’s a little easier to chew.

Weather aside, or maybe because of the weather, I thought it was about time we all got excited for spring so I came up with a few things you can do to get by until the weather catches up with our eagerness.  Some of these things are specific to the Twin Cities area, but similar events are happening across the country.

  1. Force branches. Cut branches off of spring blooming trees and shrubs that need pruning, bring them in and put them in water.  In a few days you’ll have spring inside regardless of the weather outside. Learn more about which kinds of trees and shrubs and how-to here.
  2. Plant an indoor bulb garden.  Many nurseries and garden centers are now carrying bulb gardens that you can watch grow, or better yet, buy bulbs and make your own.
  3. Plan your garden.  Grab plans, pictures and notes from your garden journal and plot out your plan for this season.
  4. Build a plant stand with grow lights and start seeds indoors.
  5. Plant edible spring planters.
  6. Buy yourself some cut flowers.  It doesn’t have to be expensive, even $5 can bring a nice burst of color and a smile to your face.
  7. Go to a flower show.  Macy’s Flower Show is traveling the country.  Check here to see when they’ll be in a city near you.
  8. Make a fairy garden. Need inspiration?  The MN Landscape Arboretum is hosting Tiny Treasures: Fairies and Gnomes through March 31st.
  9. Visit a Farmer’s Market!  This Saturday, March 23, 2013, the Bachman’s on Lyndale will be hosting Fresh From the Freeze the Kingfield and Fulton Farmers Markets in the Greenhouse from 9am – 2pm.  There will be music, entertainment, beer, wine and hard cider too.  A vendor list is posted on their site.
  10. Looking to add some spring to your home?  Check out the Bachman’s Spring Ideas House 2013 from April 4th – April 28th.
  11. Visit the Como Park Conservatory. Can’t get there?  Check out the 360 degree view of The Sunken Gardens and The Palm Dome.
  12. Get baby chicks! Our chickens have brought so much sunshine and joy to some of the coldest days.  Egg|Plant Urban Farm Supply has chicks arriving on a weekly basis.  Order yours now. (I also know of a possible source if you’re local, contact me and I’ll connect you.) You can build your coop while they grow!  Not ready for your own?  Stop by and visit them.
  13. Start a windowsill garden.
  14. Plant grass in egg shells or a basket.  You’ll be ready for Easter.
  15. Take a trip down South.  No, actually I don’t mean on a plane or in a car.  Grab your jacket, don your hat, slip on those boots and head to the South side of your house, apartment building, what have you.  The South side of buildings gets the best sun and typically retains heat making that area a little micro-climate where the ground thaws early and plants emerge first.  A friend told me just yesterday that her tulips are “up” (poking through the ground) on the South side of her house.  Take a trip and report back on what you find!
  16. Feed the birds!  According to the birds spring is definitely here.  Don’t believe me?  Shut everything off, radio, TV, your kids 😉 and listen.  The birds a singing their sweet little heads off.  Want to hear them more clearly?  Hang a feeder in your yard (or fill-up that empty one), they’ll be singing songs of glory for you!

If all else fails, call me!  I’d be happy to chat about and help you plan your yard and garden for the upcoming season!

Happy Spring everyone!

Kate